
Have you had a chance to check out the new and improved google sites? If you haven't stop what you are doing and check it out...NOW!
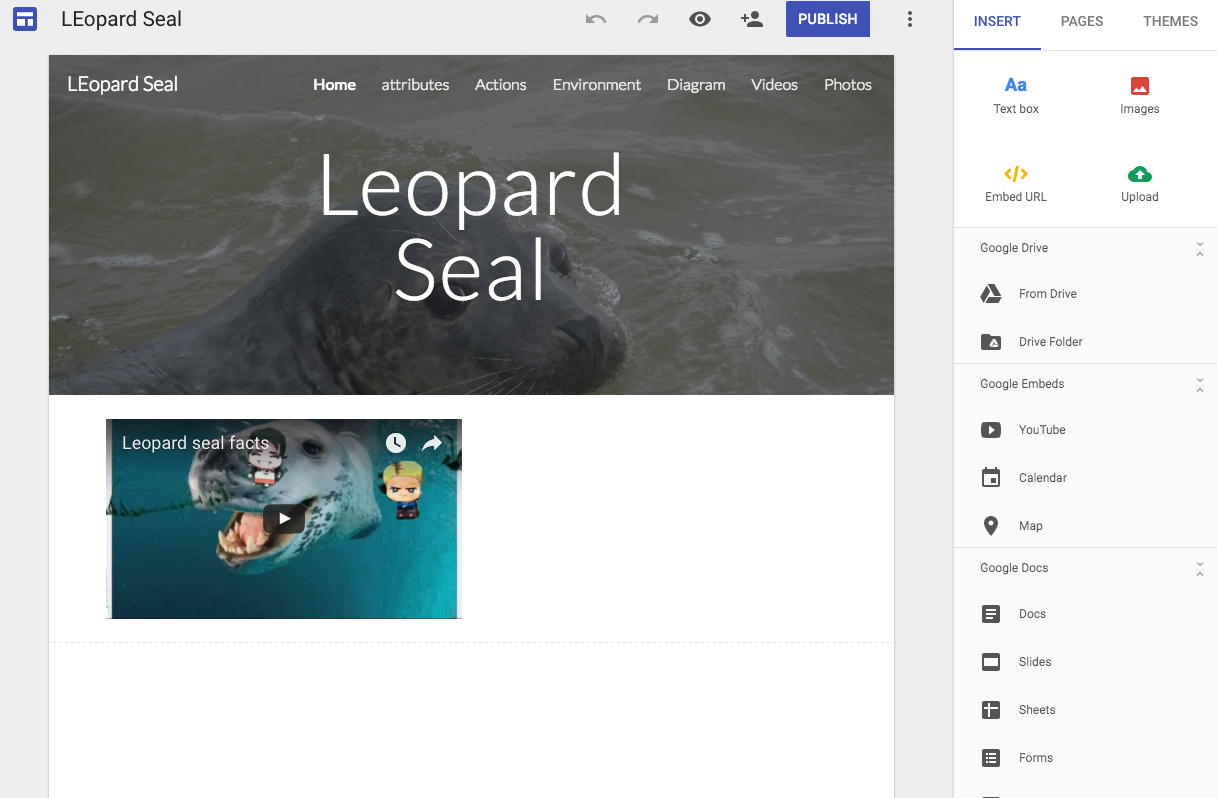
Here is an example of one of the awesome sites my first graders made!
Brief overview of Google Sites
Throughout January and we studied Arctic Animals, my first graders researched various arctic animals. This year instead of making a book or interactive notebook on the arctic animals I thought… let's make a google site! I enlisted my 6 “tech helpers” to be the leaders of each group. Each group leader chose one arctic animal to research and all students got to choose the group they wanted to work in. We had researched the animals and knew key facts here is a sample of the data collection sheet I made for my students to record their data as they researched.
As my students sat on our rug I showed them how to make a google site starting from the beginning. There are a few key things you need to explicitly show them so they are able to independently create their own Google Site:
- How to name their site
- Add editors (collaborators)
- Add pages
- Embed URL's
- Change the header wording and picture
- Add items from their drive
***I have shown all these features in the video here.
I have each group leader these guidelines for making sites. Along with a blank template for slides I sent out for the actions and attributes page. The leader was responsible for making the site and adding their group members to collaborate together (I did have to help with sharing to the other group members)! As a group they worked together to complete all the pages. Once all the group members were added as editors or collaborators multiple students could collaborate on the site at the same time, much like a shared Google Doc.
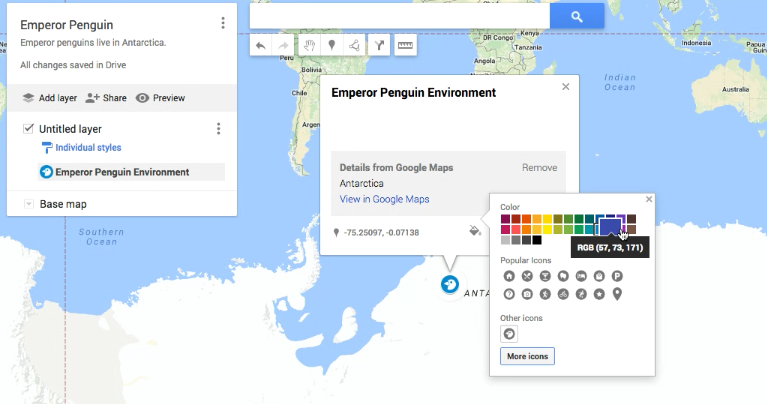
Students were able to use apps like My Maps to make a map of where their arctic animal lived here is a tutorial of how to make a My Map. My students really enjoyed customizing their maps by changing the title, the icon and color of the place marker. Once they have created a MyMap it is saved in their Drive and can be added directly to their Google Site!
I had originally intended for my kids to make a google drawing for the diagram tab, however when my students went to their drive they wanted to use the pixel art template made by Alice Keeler to make a diagram… why didn't I think of that?! I did not want to hinder their creativity so I allowed for them to create their diagram using any method they chose.
You may have noticed I like choice and so do my kids! We have been learning about lego movie and stop action movies so I sent out this hyperdoc on some creative options to make their own video the only direction was to give 5 facts about their arctic animal. I even had one group use the 3D printer to print out their animal! Most students chose to make an “avatar” using the PaperChibiLite on the iPad. The creation is easy but the assembly was a struggle, I allowed the students to cut their own Chibi’s with very specific directions not to cut off the tabs...some tabs got cut but that's the beauty of a hand crafted item! I had some 5th grade volunteers come in and help my kids fold their chibi’s and some even glue them.
You may have noticed that the Chibi is missing arms I told the students that could have arms if they cut them. Some opted to forgo the arms.
These students used DoInk Green Screen app with a picture of their arctic animal in the background. We used a green screen sheet draped over a desk and the students wore green soccer socks (because they were much cheaper than green gloves) over their hands/arms both items were purchased on Amazon.
I made a script outline that the student could use for their video, students were responsible to add their facts and decide who would say what. I uploaded their videos to my YouTube to ensure they were unlisted. Here is our finished project!
Tips and Tricks
We did most of the Google Site creations in small groups each group had 4 students and I tried to work with 2 groups at once (Next time I think I will limit groups to around 3 members to help facilitate collaboration). We did this daily during rotations and it took about a week. Students would ask me ALL day long if they could work on their website and I had to stay in a few recesses to let them keep working. Students would bring their parents in to the class to show them their creations after school.
Some tips: make sure YOU the teacher do the YouTube search for videos, especially for things like killer whales, we searched “orca information kids”! You can search images directly in sites so make sure your students have the correct spelling of whatever image they are searching for (i.e. Orcas, emperor penguins) for the best results. I had to change the permissions on the slides, maps, and diagrams so that “anyone with link can view” and this was on the student's account if you are using a district account you have to change this setting or the "ask for permission" page will pop up!
Next Projects
I plan to have each student make a site to showcase their work to present at open house. Because you can upload work from google drive so easily students will be able to link pictures and past work on their site, then they can add a narrative about the assignment.

No comments:
Post a Comment